The simplest way to add Google sign-in to your Next.js app
This guide shows how to spin up a Next.js (App Router) project that signs users in with Google.
We'll use Prisma ORM and BetterAuth.
The final product is in this Github repo that you can clone and start using as a starter project:
tomdekan/tom-auth-starterView on GitHubHere's a demo of what we'll build:
If you're using Django (or python generally), check out my guide on The simplest way to add Google sign-in to your Django app ✍️.
When building OAuth, you have a choice of either:
- managing auth yourself in your existing database, or
- using an additional managed service for auth and storing your user table, like Clerk or Auth0.
I've used a mix of both in the past. I prefer keeping all my data in one database and handling authentication myself. Some benefits are:
- complete control over your data
- a faster development experience because you don't need to set up a webhook or a tunnel (Ngrok or Tailscale) in order to test Sign-In locally. You would need these tools if you were using an external managed provider to call your local computer when you're developing.
This guide is for the first option.
1. Scaffold the project
npx create-next-app@latest ultra-starter-app \
  --typescript --app --eslint --tailwind --src-dir --import-alias "@/*"
cd ultra-starter-app
The flags give you TypeScript, the new
app/router, Tailwind, and clean import paths — nothing else.
2. Install runtime + tooling
You can store user sessions in your own database, or a managed user database like Clerk or Auth0.
I much prefer to store user data in my own database; it's secure, flexible, and cheaper than using a managed service. One key advantage is that you don't need to always expose an internet endpoint from your local machine when developing for the external managed service.
So, I'll use a PostgreSQL database to store user sessions.
Install the dependencies:
pnpm add better-auth @prisma/client
pnpm add -D prisma @better-auth/cli
BetterAuth is the auth engine we'll use. The CLI will later generate the Prisma schema for you. You can write this schema manually, but I'll use the CLI to generate it.
3. Environment variables
Create .env in the repo root (E.g., inside ./ultra-starter-app):
# BetterAuth
BETTER_AUTH_SECRET=replace-with-64-random-hex
BETTER_AUTH_URL=http://localhost:3000

# Google OAuth
GOOGLE_CLIENT_ID=xxx.apps.googleusercontent.com
GOOGLE_CLIENT_SECRET=yyy

# Database
DATABASE_URL=postgresql://<user-to-create>:<password-to-create>@localhost:5432/<database-to-create>
To set the BETTER_AUTH_SECRET, you can use openssl rand -hex 32 to generate a random secret.
Leaving any of these blank will crash the server – by design, not a placeholder.
How to set up your PostgreSQL database
- Install PostgreSQL if you don't have it already (E.g., using Homebrew):
brew install postgresqlAlternatively, you can install it using Postgres.app, which offers a nice graphical interface.
- Create a user with a password and database:
createuser -s ultra_starter_user
psql -c "ALTER USER ultra_starter_user WITH PASSWORD 'special-password';"
createdb ultra_starter_db- Update your
.envfile with the credentials:
DATABASE_URL=postgresql://ultra_starter_user:special-password@localhost:5432/ultra_starter_dbGet Google client ID and secret
These are the details that tie your app to Google. This is tricky to find, so I'll walk you through it.
As a prerequisite, you need a Google account.
- Go to the Google Cloud Console.
- Create a new project. (You might need to click on your existing project to see this option.)
- Select the new project
- Go to the OAuth consent screen and complete the form
- Click to create Oauth client ID and secret.
- Select web application.
- Enter the following: - Authorized JavaScript origins: http://localhost:3000 - Authorized redirect URIs: http://localhost:3000/api/auth/callback/google (Note: We'll need to add the production URL here after we deploy to Vercel.)
- Click create and download the JSON credentials file.
- Open the JSON file
- Copy the client ID and secret and paste them into your
.envfile.
4. Initialize Prisma
- From the root of the project, run:
npx prisma init --datasource-provider postgresqlThe command creates a bare-bones prisma/schema.prisma.
As mentioned earlier, you can write this schema manually, but I'll use the CLI to generate it.
- Generate your prisma client: This is the generated typescript code that prisma uses to interact with your database:
- Generate your prisma client:
pnpm prisma generateConnect BetterAuth to your database
We need to create a Better Auth instance.
- Create a file named auth.ts in your project root
touch auth.ts- Import Better Auth and create your auth instance. Make sure to export the auth instance with the variable name auth or as a default export.
import { betterAuth } from 'better-auth'
import { prismaAdapter } from 'better-auth/adapters/prisma'
import { PrismaClient } from './src/generated/prisma'

const prisma = new PrismaClient()

export const auth = betterAuth({
  database: prismaAdapter(prisma, {
    provider: 'postgresql',
  }),
})
5. Connect Prisma to BetterAuth
- Generate the schema fragments BetterAuth needs:
npx @better-auth/cli@latest generate --yThe CLI merges the extra models into prisma/schema.prisma; no manual edits needed.
you can check the generated schema in the prisma/schema.prisma file. You should see User, Session, Account, and Verification tables.
Trouble shooting: If this fails with Couldn't read your auth config., follow the steps in the error message and make sure that your imported Prisma client path is pointing to the correct location of the generatd prima client.
-
Make sure
-
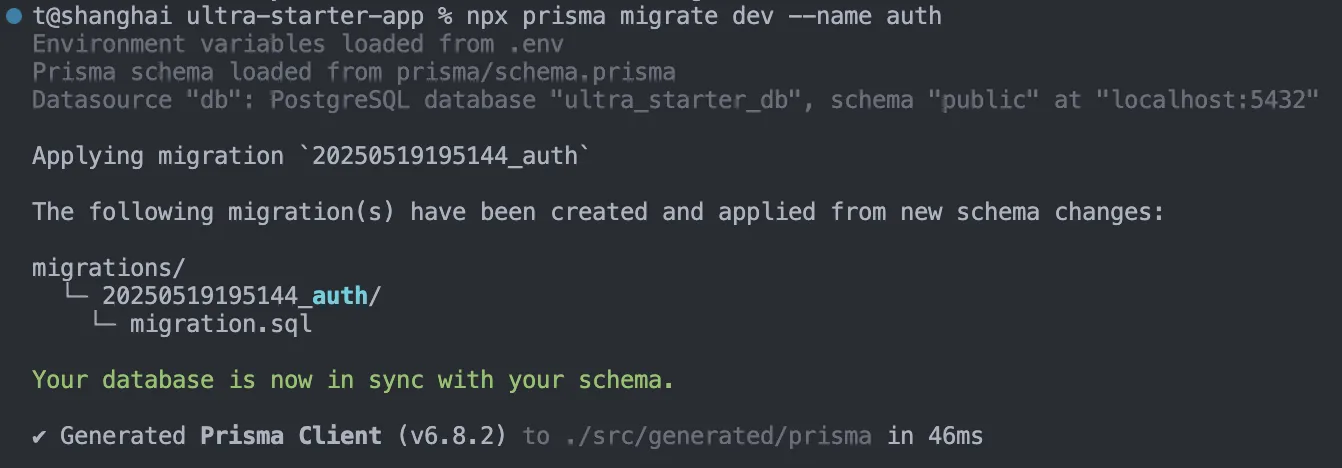
Run an initial migration:
npx prisma migrate dev --name authYou should see the following output:
6. Update your auth.ts file
In ./auth.ts:
import { betterAuth } from 'better-auth'
import { prismaAdapter } from 'better-auth/adapters/prisma'
import { PrismaClient } from './src/generated/prisma'
import { inferAdditionalFields } from 'better-auth/client/plugins'

const prisma = new PrismaClient()

export const auth = betterAuth({
  database: prismaAdapter(prisma, {
    provider: 'postgresql',
  }),
  socialProviders: {
    google: {
      clientId: process.env.GOOGLE_CLIENT_ID!,
      clientSecret: process.env.GOOGLE_CLIENT_SECRET!,
    },
  },
  plugins: [inferAdditionalFields()],
})

export type Session = typeof auth.$Infer.Session
7. Expose the auth handler to Next.js (App Router)
In ./app/api/[...all]/route.ts (Create this file if it doesn't exist):
import { auth } from '../../../auth'
import { toNextJsHandler } from 'better-auth/next-js'

export const { GET, POST } = toNextJsHandler(auth.handler)
8. Create a thin client wrapper
In ./src/lib/auth-client.ts (Create this file if it doesn't exist):
import { inferAdditionalFields } from 'better-auth/client/plugins'
import { createAuthClient } from 'better-auth/react'
import type { auth } from '../../auth'

export const authClient = createAuthClient({
  plugins: [inferAdditionalFields<typeof auth>()],
})

export type Session = typeof authClient.$Infer.Session
9. Create a public sign-in page
In ./app/(auth)/sign-in/page.tsx (Create this file if it doesn't exist):
'use client'

import { authClient } from '@/lib/auth-client'

export default function SignIn() {
  const handleLogin = async () =>
    authClient.signIn.social({ provider: 'google', callbackURL: '/dashboard' })

  return (
    <main className="flex min-h-screen items-center justify-center">
      <button
        onClick={handleLogin}
        className="rounded-lg bg-black px-6 py-3 text-white hover:opacity-80"
      >
        Sign in with Google
      </button>
    </main>
  )
}
10. Create an auth client
This is the code you'll use to interact with the auth service.
Create ./src/lib/auth-client.ts and add the following code:
import { inferAdditionalFields } from 'better-auth/client/plugins'
import { createAuthClient } from 'better-auth/react'
import type { auth } from '../../auth'

export const authClient = createAuthClient({
  plugins: [inferAdditionalFields<typeof auth>()],
})

export type Session = typeof authClient.$Infer.Session
10. Create a sign out button
- Create a sign out button component in
./components/SignOutButton.tsx(Create this file if it doesn't exist):
'use client'

import { authClient } from '@/lib/auth-client'
import { useRouter } from 'next/navigation'

export const SignOutButton = () => {
  const router = useRouter()

  const handleSignOut = async () => {
    await authClient.signOut()
    router.refresh()
  }

  return (
    <button
      onClick={handleSignOut}
      className="text-xs text-red-300 transition hover:text-red-200"
    >
      Sign Out
    </button>
  )
}
11. Create a protected dashboard page
This is the page that the user won't be able to access without being signed in.
In ./app/dashboard/page.tsx (Create this file):
import { redirect } from 'next/navigation'
import { SignOutButton } from '../../components/SignOutButton'
import { auth } from '../../../auth'
import { headers } from 'next/headers'

export default async function Dashboard() {
  const session = await auth.api.getSession({
    headers: await headers(),
  })

  if (!session) {
    redirect('/sign-in')
  }

  return (
    <section className="p-10">
      <h1 className="text-2xl font-bold">Welcome, {session.user.name}!</h1>
      <p className="mt-2">You made it to the protected area. 🎉</p>
      <SignOutButton />
    </section>
  )
}
11. Lock it down globally with middleware
In ./middleware.ts (Create this file if it doesn't exist):
This is the middleware that will check if the user is signed in. If they are not, it will redirect them to the sign-in page.
import { NextRequest, NextResponse } from 'next/server'
import { getSessionCookie } from 'better-auth/cookies'

export function middleware(req: NextRequest) {
  const cookie = getSessionCookie(req) // cheap — cookie-only check that doesn't call the database on each request.
  if (!cookie) {
    return NextResponse.redirect(new URL('/sign-in', req.url))
  }
  return NextResponse.next()
}

export const config = { matcher: ['/dashboard'] }
13. Bonus: Let's update the sign-in page to look polished
Replace the ./app/(auth)/sign-in/page.tsx file with the following:
This includes smooth animations and satisfying hover effects, courtesy of Framer Motion and Gemini 2.5 Pro:
'use client'

import { authClient } from '@/lib/auth-client'
import { motion } from 'framer-motion'
import { useState } from 'react'

const SignIn = () => {
  const [isHovering, setIsHovering] = useState(false)

  const handleLogin = async () =>
    authClient.signIn.social({ provider: 'google', callbackURL: '/dashboard' })

  return (
    <main className="flex min-h-screen items-center justify-center overflow-hidden bg-gradient-to-br from-gray-900 to-black">
      <div className="relative">
        {/* Animated background elements */}
        {[...Array(6)].map((_, i) => (
          <motion.div
            key={i}
            className="absolute rounded-full bg-blue-500/10"
            initial={{
              width: `${50 + i * 20}px`,
              height: `${50 + i * 20}px`,
              x: -25 - i * 10,
              y: -25 - i * 10,
              opacity: 0.2,
            }}
            animate={{
              scale: [1, 1.1, 1],
              opacity: [0.2, 0.3, 0.2],
            }}
            transition={{
              duration: 4 + i,
              repeat: Infinity,
              ease: 'easeInOut',
              delay: i * 0.5,
            }}
          />
        ))}

        <motion.div
          className="relative z-10 flex flex-col items-center justify-center rounded-xl border border-white/10 bg-white/5 p-10 backdrop-blur-lg"
          initial={{ opacity: 0, y: 20 }}
          animate={{ opacity: 1, y: 0 }}
          transition={{ duration: 0.6, ease: 'easeOut' }}
        >
          <motion.h1
            className="mb-6 text-3xl font-bold text-white"
            initial={{ opacity: 0 }}
            animate={{ opacity: 1 }}
            transition={{ delay: 0.2, duration: 0.8 }}
          >
            Welcome Back
          </motion.h1>

          <motion.div
            whileHover={{ scale: 1.05 }}
            whileTap={{ scale: 0.98 }}
            onHoverStart={() => setIsHovering(true)}
            onHoverEnd={() => setIsHovering(false)}
          >
            <button
              onClick={handleLogin}
              className="group relative flex items-center gap-2 overflow-hidden rounded-lg bg-white px-8 py-3 text-lg font-medium text-gray-900 shadow-lg transition-all"
            >
              <motion.div
                className="absolute inset-0 bg-gradient-to-r from-blue-500 to-indigo-600"
                initial={{ x: '-100%' }}
                animate={{ x: isHovering ? '0%' : '-100%' }}
                transition={{ duration: 0.3 }}
              />

              <motion.span className="relative z-10 text-gray-900 transition-colors duration-300 group-hover:text-white">
                Sign in with Google
              </motion.span>

              <motion.svg
                xmlns="http://www.w3.org/2000/svg"
                className="relative z-10 h-5 w-5 text-gray-900 transition-colors duration-300 group-hover:text-white"
                viewBox="0 0 24 24"
                initial={{ rotate: 0 }}
                animate={{ rotate: isHovering ? 360 : 0 }}
                transition={{ duration: 0.5 }}
              >
                <path
                  fill="currentColor"
                  d="M22.56 12.25c0-.78-.07-1.53-.2-2.25H12v4.26h5.92c-.26 1.37-1.04 2.53-2.21 3.31v2.77h3.57c2.08-1.92 3.28-4.74 3.28-8.09z"
                />
                <path
                  fill="currentColor"
                  d="M12 23c2.97 0 5.46-.98 7.28-2.66l-3.57-2.77c-.98.66-2.23 1.06-3.71 1.06-2.86 0-5.29-1.93-6.16-4.53H2.18v2.84C3.99 20.53 7.7 23 12 23z"
                />
                <path
                  fill="currentColor"
                  d="M5.84 14.09c-.22-.66-.35-1.36-.35-2.09s.13-1.43.35-2.09V7.07H2.18C1.43 8.55 1 10.22 1 12s.43 3.45 1.18 4.93l3.66-2.84z"
                />
                <path
                  fill="currentColor"
                  d="M12 5.38c1.62 0 3.06.56 4.21 1.64l3.15-3.15C17.45 2.09 14.97 1 12 1 7.7 1 3.99 3.47 2.18 7.07l3.66 2.84c.87-2.6 3.3-4.53 6.16-4.53z"
                />
              </motion.svg>
            </button>
          </motion.div>

          <motion.div
            className="mt-8 text-sm text-gray-400"
            initial={{ opacity: 0 }}
            animate={{ opacity: 1 }}
            transition={{ delay: 0.4, duration: 0.8 }}
          >
            Tom's auth demo with Better Auth
          </motion.div>
        </motion.div>
      </div>
    </main>
  )
}

export default SignIn- Bonus: Update the home page to look better
- Replace the
./app/page.tsxfile with the following:
import Link from 'next/link'
import { SignOutButton } from '../components/SignOutButton'
import { authClient } from '@/lib/auth-client'

export default async function Home() {
  const session = await authClient.getSession()
  const sessionData = session.data

  return (
    <div className="min-h-screen bg-gradient-to-br from-slate-900 to-indigo-950 text-white">
      <div className="mx-auto max-w-5xl px-4 py-16">
        {/* Header with user info */}
        <header className="mb-16 flex items-center justify-between">
          <div className="flex items-center space-x-2">
            <div className="h-8 w-8 animate-pulse rounded-full bg-blue-500"></div>
            <h1 className="text-2xl font-bold">Auth Demo</h1>
          </div>

          {sessionData ? (
            <div className="flex items-center gap-3 rounded-full bg-white/10 py-2 pl-3 pr-5 backdrop-blur-sm transition hover:bg-white/15">
              {sessionData.user.image ? (
                <img
                  src={sessionData.user.image}
                  alt={`${sessionData.user.name}'s profile`}
                  width={32}
                  height={32}
                  className="rounded-full ring-2 ring-blue-400"
                />
              ) : (
                <div className="flex h-8 w-8 items-center justify-center rounded-full bg-blue-500">
                  <span>{sessionData.user.name?.[0]}</span>
                </div>
              )}
              <div>
                <p className="text-sm font-medium">{sessionData.user.name}</p>
                <div className="flex items-center justify-between">
                  <Link
                    href="/dashboard"
                    className="text-xs text-blue-300 hover:underline"
                  >
                    Dashboard →
                  </Link>
                  <span className="px-2">•</span>
                  <SignOutButton />
                </div>
              </div>
            </div>
          ) : (
            <Link
              href="/sign-in"
              className="inline-flex items-center gap-2 rounded-full bg-white/10 px-5 py-2 backdrop-blur-sm transition-all hover:bg-white/15"
            >
              <span>Sign In</span>
              <svg
                width="16"
                height="16"
                viewBox="0 0 24 24"
                fill="none"
                xmlns="http://www.w3.org/2000/svg"
              >
                <path
                  d="M14 5L21 12M21 12L14 19M21 12H3"
                  stroke="currentColor"
                  strokeWidth="2"
                  strokeLinecap="round"
                  strokeLinejoin="round"
                />
              </svg>
            </Link>
          )}
        </header>

        {/* Main content */}
        <main className="flex flex-col items-center">
          <div className="group relative mb-16">
            <div className="absolute -inset-0.5 rounded-lg bg-gradient-to-r from-blue-600 to-indigo-600 opacity-30 blur transition duration-1000 group-hover:opacity-80"></div>
            <div className="relative rounded-lg border border-white/10 bg-black/50 p-8 backdrop-blur-md">
              <h2 className="mb-4 bg-gradient-to-r from-blue-400 to-indigo-400 bg-clip-text text-center text-3xl font-bold text-transparent md:text-4xl">
                Next.js Google Authentication
              </h2>
              <p className="text-center text-lg text-gray-300">
                {sessionData
                  ? `You're signed in as ${sessionData.user.name}. Explore the dashboard to see more.`
                  : 'Experience seamless authentication with Google. Sign in to get started.'}
              </p>

              <div className="mt-8 flex justify-center">
                {sessionData ? (
                  <Link
                    href="/dashboard"
                    className="inline-flex transform items-center gap-2 rounded-lg bg-gradient-to-r from-blue-500 to-indigo-600 px-6 py-3 font-medium text-white transition hover:scale-105 hover:from-blue-600 hover:to-indigo-700"
                  >
                    View Dashboard
                    <svg
                      width="16"
                      height="16"
                      viewBox="0 0 24 24"
                      fill="none"
                      xmlns="http://www.w3.org/2000/svg"
                    >
                      <path
                        d="M5 12H19M19 12L12 5M19 12L12 19"
                        stroke="currentColor"
                        strokeWidth="2"
                        strokeLinecap="round"
                        strokeLinejoin="round"
                      />
                    </svg>
                  </Link>
                ) : (
                  <Link
                    href="/sign-in"
                    className="inline-flex transform items-center gap-2 rounded-lg bg-gradient-to-r from-blue-500 to-indigo-600 px-6 py-3 font-medium text-white transition hover:scale-105 hover:from-blue-600 hover:to-indigo-700"
                  >
                    Sign in with Google
                    <svg
                      width="20"
                      height="20"
                      viewBox="0 0 24 24"
                      fill="currentColor"
                      xmlns="http://www.w3.org/2000/svg"
                    >
                      <path d="M22.56 12.25c0-.78-.07-1.53-.2-2.25H12v4.26h5.92c-.26 1.37-1.04 2.53-2.21 3.31v2.77h3.57c2.08-1.92 3.28-4.74 3.28-8.09z" />
                      <path d="M12 23c2.97 0 5.46-.98 7.28-2.66l-3.57-2.77c-.98.66-2.23 1.06-3.71 1.06-2.86 0-5.29-1.93-6.16-4.53H2.18v2.84C3.99 20.53 7.7 23 12 23z" />
                      <path d="M5.84 14.09c-.22-.66-.35-1.36-.35-2.09s.13-1.43.35-2.09V7.07H2.18C1.43 8.55 1 10.22 1 12s.43 3.45 1.18 4.93l3.66-2.84z" />
                    </svg>
                  </Link>
                )}
              </div>
            </div>
          </div>

          {/* Features */}
          <div className="grid w-full grid-cols-1 gap-6 md:grid-cols-3">
            {[
              {
                title: 'Secure Auth',
                description: 'OAuth 2.0 powered authentication with Google',
                icon: (
                  <svg
                    className="h-6 w-6 text-blue-400"
                    fill="none"
                    stroke="currentColor"
                    viewBox="0 0 24 24"
                    xmlns="http://www.w3.org/2000/svg"
                  >
                    <path
                      strokeLinecap="round"
                      strokeLinejoin="round"
                      strokeWidth={2}
                      d="M12 15v2m-6 4h12a2 2 0 002-2v-6a2 2 0 00-2-2H6a2 2 0 00-2 2v6a2 2 0 002 2zm10-10V7a4 4 0 00-8 0v4h8z"
                    />
                  </svg>
                ),
              },
              {
                title: 'App Router',
                description: 'Built with Next.js App Router for modern routing',
                icon: (
                  <svg
                    className="h-6 w-6 text-blue-400"
                    fill="none"
                    stroke="currentColor"
                    viewBox="0 0 24 24"
                    xmlns="http://www.w3.org/2000/svg"
                  >
                    <path
                      strokeLinecap="round"
                      strokeLinejoin="round"
                      strokeWidth={2}
                      d="M4 5a1 1 0 011-1h14a1 1 0 011 1v2a1 1 0 01-1 1H5a1 1 0 01-1-1V5zM4 13a1 1 0 011-1h6a1 1 0 011 1v6a1 1 0 01-1 1H5a1 1 0 01-1-1v-6zM16 13a1 1 0 011-1h2a1 1 0 011 1v6a1 1 0 01-1 1h-2a1 1 0 01-1-1v-6z"
                    />
                  </svg>
                ),
              },
              {
                title: 'User Profiles',
                description: 'Access user data including profile images',
                icon: (
                  <svg
                    className="h-6 w-6 text-blue-400"
                    fill="none"
                    stroke="currentColor"
                    viewBox="0 0 24 24"
                    xmlns="http://www.w3.org/2000/svg"
                  >
                    <path
                      strokeLinecap="round"
                      strokeLinejoin="round"
                      strokeWidth={2}
                      d="M16 7a4 4 0 11-8 0 4 4 0 018 0zM12 14a7 7 0 00-7 7h14a7 7 0 00-7-7z"
                    />
                  </svg>
                ),
              },
            ].map((feature, index) => (
              <div
                key={index}
                className="rounded-lg border border-white/10 bg-white/5 p-6 backdrop-blur-sm transition hover:bg-white/10"
              >
                <div className="mb-3 flex items-center gap-3">
                  {feature.icon}
                  <h3 className="text-lg font-semibold">{feature.title}</h3>
                </div>
                <p className="text-gray-300">{feature.description}</p>
              </div>
            ))}
          </div>
        </main>
      </div>
    </div>
  )
}
12. Test it locally
pnpm devAnd visit http://localhost:3000/sign-in, press the Google button, and you should land on /dashboard with your name pulled from the Google profile.
13. Deploy
The next step is to deploy! I generally use Vercel, but you can use any other platform. Let me know if you want me to cover this.
The key points (if you're using Vercel) would be:
- Run
vercel deployto link and deploy your app to Vercel - Add the same env vars from step 3 to your Vercel project, adding a new auth secret for production.
- Update your Google OAuth authorization callback URL at the Google Cloud Console to your Vercel production URL (e.g.
https://<your-vercel-app-name>.vercel.app/api/auth/callback/google).
Congrats
Congrats on adding Google sign-in to your Next.js app! I'd always be interested in seeing what you've built.
As mentioned, the full guide with code is below. It's also in a Github repo that you can clone and start using: tomdekan/tom-auth-starterView on GitHub